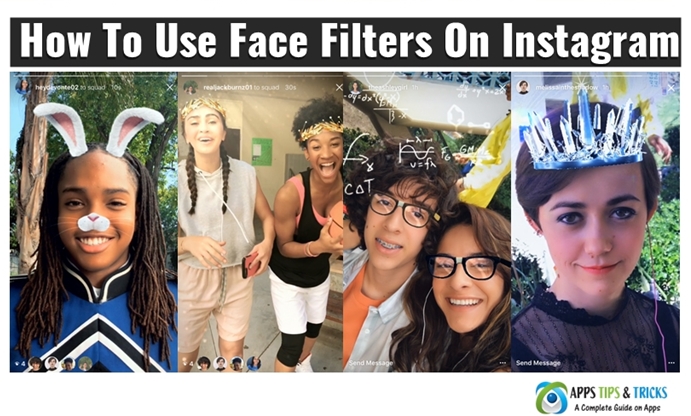
Instagram – one of the most popular photo-sharing apps that allow users to share pictures and videos has made a huge update last Tuesday adding several new features. These new features are available on both iOS and Android devices. One of the biggest addition is the Face Filters – much like similar features in Snapchat. Like its rival Snapchat, Instagram’s Face Filters uses augmented reality to apply silly effects to your face.
The new Face Filters allows users to spice up their videos and photos with overlay effects, costumes and more on top of the user’s face. Other new features are an Eraser Tool that will let you remove drawings you have added to an image and Rewind mode to play videos in reverse. In this post, we will walk you through on How to use Face Filters as well as Eraser Tool and Rewind Mode.
How does Instagram’s Face Filters Works?
Like Snapchat, Instagram uses augmented reality or face-detection technology to follow your movements and lets you apply the various effects. The Face Filters will give instructions like “Open your mouth” and the available filters are applied to it. For example, if a butterfly flying around your head a flower crown filter will be applied or math equations appearing over your head, a nerdy glasses filter will be applied.
According to Instagram, the Face Filter feature is “an easy way to turn an ordinary selfie into something fun and entertaining, “Whether you’re sitting on the couch at home or out and about, face filters help you express yourself and have playful conversations with friends.”
The Face Filters gets activated when you open your camera, it works whether you are using your front or the back camera of your phone by tapping the new icon in the bottom right corner of your screen. The Face Filters can also be used in shooting modes such as a photo or even looping Boomerang videos. Once done with applying filters it can be added to the Instagram story or send directly to friends all within the Instagram app.
How To Get Instagram’s Face Filters?
Getting or accessing the new Face Filters feature is simple. All you have to do is using the latest version of Instagram. If you haven’t updated your Instagram to the latest version, you will need to do so by going through your respective app store. The latest version of Instagram is 10.21, this version includes all the new features. In case, if you don’t know how to update your Instagram, please follow the below instructions;
If you are on Android, Open your Play Store App, tap the Menu on the Top Right Corner and Go to My Apps & Games. Under updates look for Instagram and tap on “Updates”. If you have some problem with your phone memory/storage and couldn’t update directly from Play Store, you can download the latest version of Instagram APK.
It is recommended to download APK only from the link we have provided to stay away from unwanted malware. Also, make sure to allow the installation of APKs by enabling “Unknown Sources” from your Phone’s Security Settings.
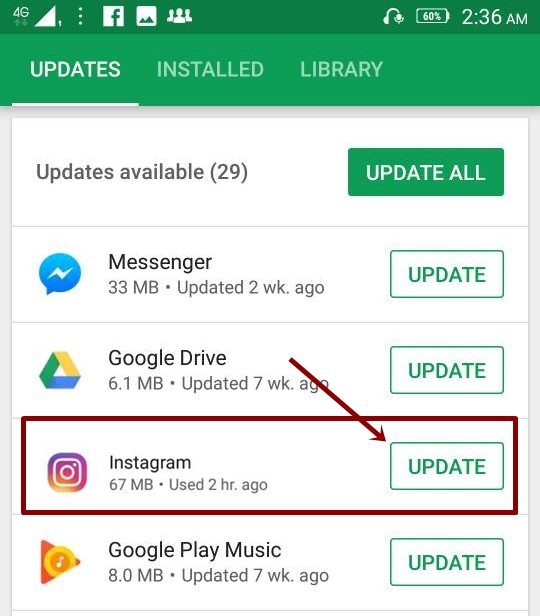
If you are on iPhone, open your App Store app, tap on the Updates and look for Instagram. Once located tap on the Updates next to Instagram.
 Instagram Face Filters List
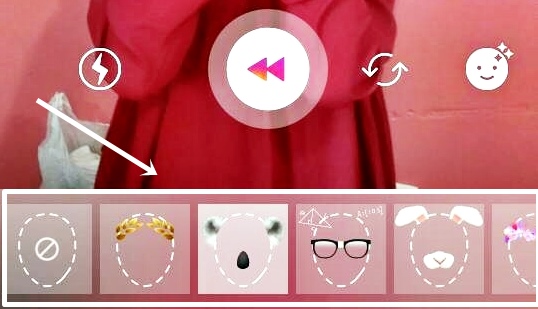
Initially, there are Eight different face filters available that users can use. According to Instagram, they will introduce more face filters to the community on a regular basis. These filters include some different crowns which make a person looks like a koala and another that sends math equations spinning around a person’s head. Let’s see the initial set of Instagram Face Filters;
1. Gold Crown: With this filter, you can add golden wreath around your head.

2. Koala: Koala filter lets you turn into your favorite furry friend with the Koala ears and a black nose when you open your mouth.
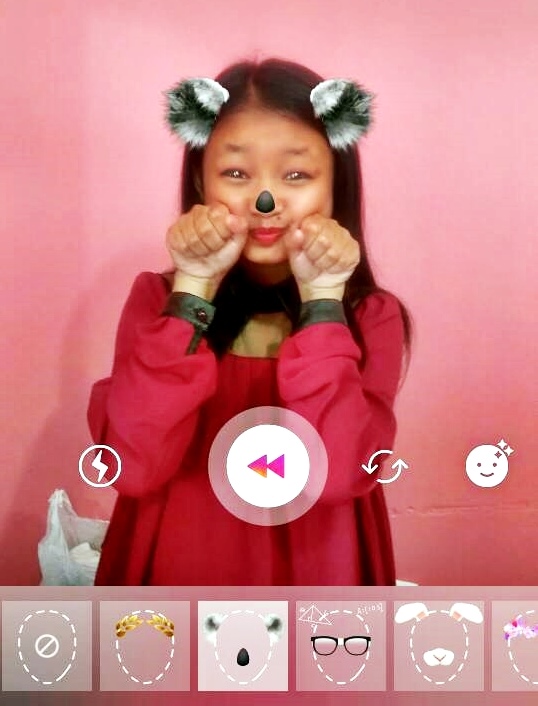
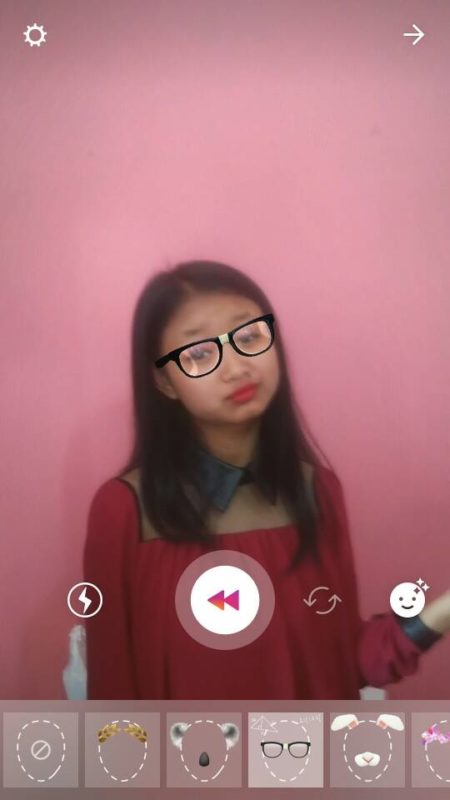
3. Nerd Glasses: With this, you can apply glasses and floating math equations above or around your head. Tilting forward will bring down your glasses.
4. Bunny: Like the Snapchat Puppy filter, this filter will give you cute little bunny ears and nose. They move along with your movement or facial expression so apply this filter is quite easy.

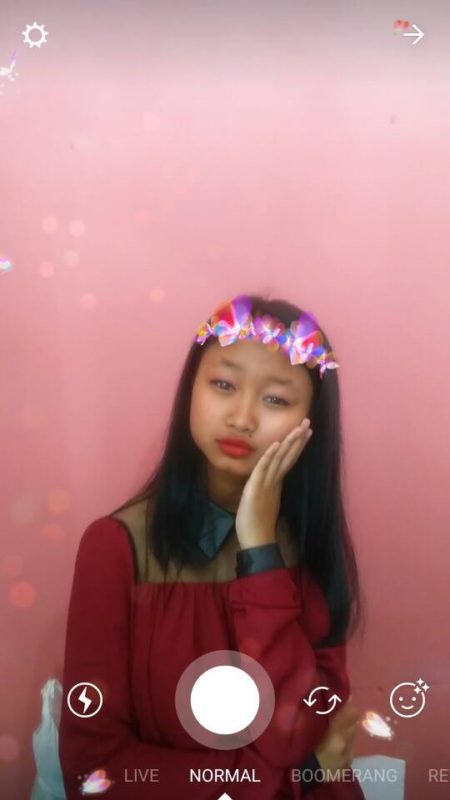
5. Butterfly Crown: This filter will add a wreath of butterflies on your head.
6. Ice Crown: This filter gives you an ice crown and snowflakes flurry around.

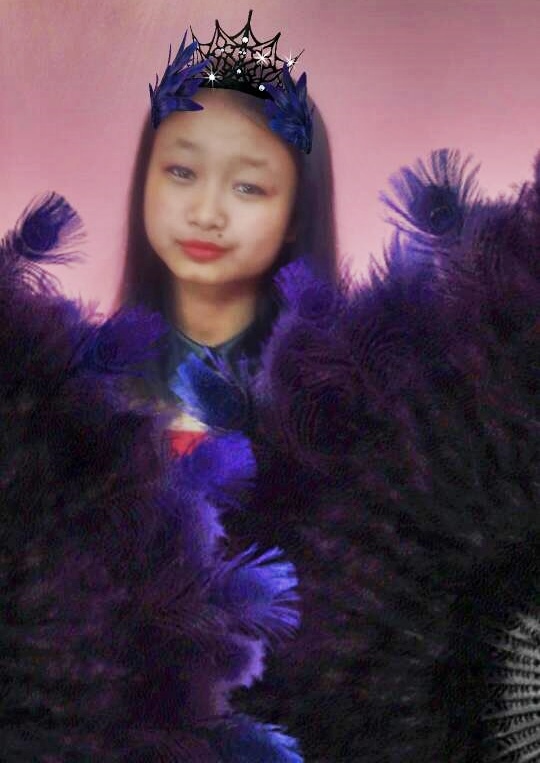
7. Peacock: A dark purple color and shaded filters of a crown on your forehead and feathers in the foreground.
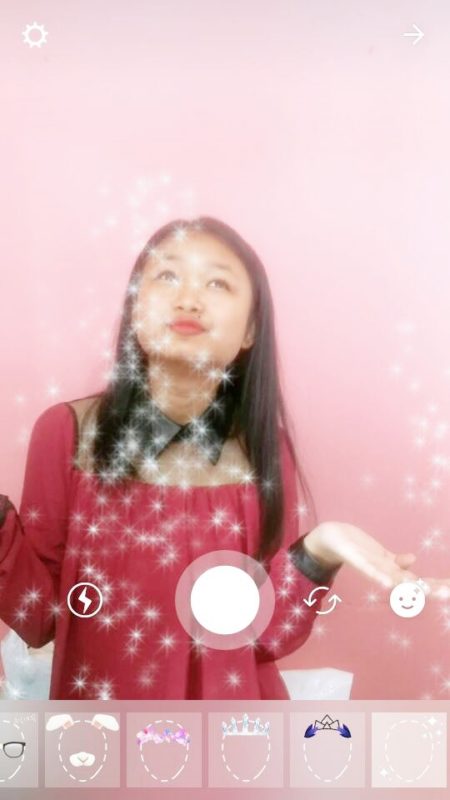
8. Makeup: This filter gives you a golden hue over you, and smooth your skin and a shining bright or a Sparkly Sparkles.
How To Use face filters on Instagram?
Let’s assume that you have installed or used the latest version of Instagram. Please note that Face filters are supported only on version 10.21 and above and also keep in mind that face filters might not work or supported on some older devices. This new Face filter works with Boomerang, Hands-Free, and Rewind camera formats, and some filters might also work with two faces at once.
Applying or using Face Filters on Instagram is quite easy and simple. Follow the step by step instruction to use Instagram Face Filters;
1. Once you update the app, open your Instagram app from your device as you normally do.
2. Tap on the camera icon at the top left of the screen or swipe right from anywhere in a feed. This will takes you to the camera screen. You can choose either a photo or a video.
3. If you want to use Filters with Boomerang or Hands-Free mode you can select from the bottom screen.

4. Now Tap on the Face icon on the bottom right-hand corner of the screen.
![]()
5. You will now see a list of available filters you can apply to. Select face filter you wish to use by swiping left and right.
6. Now Tap to take a photo or tap and hold to take a video. The filter you selected will automatically appear on the closest person’s face. This works when using the front or the back-facing camera.
7. Finally, apply the filters to your photo or video. This filter uses face detection technology to follow your movements, as you move the app will give you instructions like “Open your mouth.” To snap a photo once satisfied hit the shutter button.
8. That’s it, you can now send it to your friend or save it in your Story.
If you want to publish directly to your public feed, go back to the main screen. Now tap on the + icon at the bottom center of the screen and select the photo or clip you just saved. Tap Next, add a filter if you wish to. Now tap on Next again, add a caption and then post. It will be added to your Instagram feed.
Check Out: Instagram Captions for Selfies and Quotes You Can Use
How To Add, Hide or Rearrange Filters?
The new features give you an option to personalize your filters by adding, hiding and rearranging the filters. You can start by uploading a photo or video and then by swiping to the right on your filters until you reach the end. Now follow the below steps;
1. Tap on Manage
2. To add a filter, Tap on the filter you wish to use. Now, you will see next to the filters that currently appear when you post a photo or video.
3. To Hide a filter, Tap on the filter you wish to hide. You will see next to the filters that are hidden.
4. To Rearrange filters, Tap and hold on the filter you like to move. Then drag it to the position where you like to keep.
5. Once done, return to your photo or video.
How To Use the Rewind Tool on Instagram
Another big update the Rewind Tool, as the name suggests, the Rewind tool lets you make videos that play in reverse and it also works in Boomerang and Hands-Free mode. According to Instagram you can “drop a microphone and watch it fly up into your hand,” or to “capture a fountain in motion and share a rewind of the water floating back up.” Boomerang works in a similar way but instead loops the short burst of recording back and forth.
To make your video that plays in reverse follow the steps below;
1. Open the Instagram Stories camera
2. Swipe through the options at the bottom of the screen, now see where there is Live, Normal, Boomerang and Hands-Free until you see the Reverse recording option.
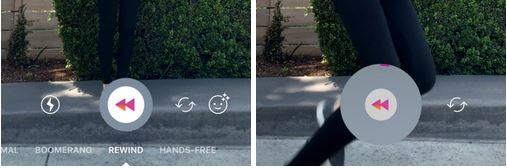
3. Now, Tap on the record button at the bottom of the screen, jump, toss, or perform any worthy action and experiment with some tricks of your own and defy the laws of physics wherever you are.
SEE: Best Instagram Accounts 2020 to Follow ~ Celebrities, Designers and more
How To Use Instagram Hashtag Stickers
Another new addition is the Hashtag Stickers, which is much like location stickers. You can now share hashtag stickers on your Instagram Stories. Instagrammers will be able to tap on these stickers to visit the hashtag page explore related posts that have been shared with the same hashtag sticker.
This new feature lets you select a new hashtag sticker from the sticker folder and customize the hashtag and then it to your story. Like in mentions, you can also add hashtags using regular text. Here’s how to use Hashtag Stickers on Instagram.
Once you have taken and satisfied with your Story image or video, tap on the Sticker icon in the toolbar on the top right corner of the screen.
![]()
The sticker menu will appear at the bottom, tap on the Hashtag option which is between the selfie and location stickers.
![]()
Now, Tap on Hashtag, enter the text and customize your hashtag as you wish. once you are satisfied, Add it to your story and post.

How To Use Instagram Eraser Brush or Tool
And last, but certainly not least, the Instagram Eraser Brush is the latest addition to let you remove things you have painted or drawn and experiment with removing colors from an image. It basically means that you can finally erase all the mistakes you have made from your drawing tools instead of having to “undo” all of it. To use the new Instagram eraser brush here is a quick guide;
1. Open your Instagram, Tap on the camera icon on the top left-hand corner of the screen and then take a photo or video.
2. Select a drawing tool from the top of the screen.
![]()
3. Hold the tool down to flood the screen with color and draw or paint.
4. To erase, Select the Eraser Brush icon from the top and tap on the specific parts of your photo you wish to erase. You can also change the size of the eraser by selecting the dots in the lower-left corner of the screen and slide along to select your desired size on the scale.
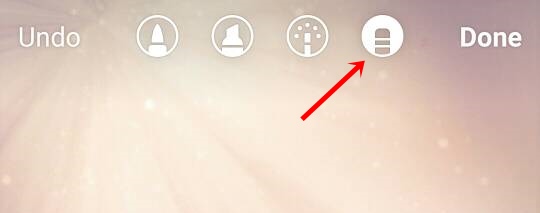
5. You are done and now share your latest photo creation with your friends.
That concludes our guide on how to use Instagram Face Filters, Hashtag Stickers, Rewind Tool, and Eraser Tool. What do you think of these new Instagram features? Let us know in the comments section below!
Check out some Related Posts on Instagram:
Instagram Won’t Open: How to Fix Instagram Not Working and Other Errors
How to Delete Instagram Account Permanently or Temporarily ~ A Guide
Instagram Search Usernames: How to Search or Find People On Instagram
How to Fix Instagram Login Error Issues: Working Tips


Pingback: How To Use Instagram Location Stories, Stories and Hastag Stories
Pingback: Instagram Search User: How to Search or Find People On Instagram
Pingback: Instagram Repost Apps: 10 Best Repost Apps for Instagram (2017)