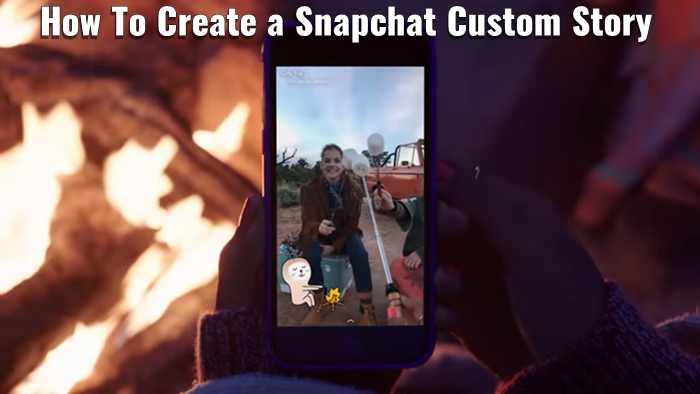
Snapchat on Tuesday (May 23, 2017) has added a new feature called Custom Stories or Group Stories. This feature allows Snapcahtters to add friends to a specific story, which can be designated by selected users or a location. Custom Stories are designed to make sharing easier especially around big events such as family gatherings, parties and much more. It is basically, the ability to create custom stories limited to specific or selected friends, or to direct contacts and their friends within a geofenced area.
In this post, we will see some of the features of the Custom Story and how to create a Snapchat Custom Story. Previously, Snapchatters can only post to their own Stories without sorting them and clips are arranged chronologically.
These new custom stories are similar to regular Snapchat Stories, but they will disappear entirely if no one within the group adds any updates for 24 hours. Only the Creator of a Custom Story’s or Group Story will be able to save the entire story to their phone; similarly contributors will also be able to save the snaps they submitted personally, but not the entire group snaps.</>
The Custom Group Story feature is designed for special occasions or events and it can be set up either Non-Geofenced or Geofenced Custom Stories. With the Non-Geofenced Custom Stories, you can create Snapchat custom story and invite specific people to the Story. These members will able to see and contribute to the Story. You can also select additional friends to view custom Stories but not contribute their own Snaps to the Group Story.
On the other, with the Geofenced Group Story you can either select any friends or Snapchatters within the specified area or location to contribute to the group, or you can just set it up so that friends of friends can also join the group. This option is useful in location settings like weddings. Custom Geofenced stories don’t let you specify a separate group with just viewing permissions, so anyone in the custom Geofence story will be able to add snaps to the Story.
With this new feature or update, we thought it’d be a good idea to prepare a quick guide on Snapchat Custom Stories, explaining on how Snapchat Custom Group Stories works, and all the steps on how to create and manage Snapchat Custom Stories.
How to get Snapchat Custom Stories Feature?
To get and enjoy the new Snapchat Custom Story, you will first need to update Snapchat app to the latest version. The first step is to update your Snapchat app from your respective app store.
If you are on Android device, open your Play Store, tap on the menu which is located at the top right hand side of the screen and select ‘My Apps & Games’. Once tapped, you will see a list of your Apps currently installed. Now, look for Snapchat, if update is available for you, you will see an Update button, click or tap on the Update button.
If you’re on iOS device, just go to ‘Updates’ to check for new versions of your installed apps. If Snapchat is in the list then you can go ahead and download the update.
Some Key Facts about Snapchat Custom Stories
Now let’s have a look at some of the key facts about the new Snapchat Custom Stories.
1. The Snaps you add to a Custom Story will only last for 24 hours.
2. A Custom Story can last as long as you and your friends keep adding to it, but it will disappear from your Stories screen if no one adds to the story in the last 24 hours.
3. You can only create and add to up to 3 Custom Stories at a time.
4. You can keep adding to a Geofenced Story for few hours after you leave the Geofence, so you can share your journey home.
5. You can include up to 1,000 Snaps at a time. After that, any new Snaps added to a Story will replace the oldest ones.
6. The person who created a Custom Story can save the entire snaps.
7. When the creator of a Custom Story deletes it, all the Snaps in the group are deleted. However, anyone involved in it can save their Snaps and screenshot someone’s Snaps beforehand.
8. Since you can only add to a Geofenced Story once you are within range of it, keep in mind that adding to one can sometimes let people know where you are. Please keep in mind that a Custom Story will earn more, the longer it is.
How To Create a Snapchat Custom Story
As mentioned above, there are two types of Custom Stories you can create. With Group Stories, you and your selected Snapchatters can create new Stories together. With Geofenced Stories, you can create Stories that you and all your friends and even their friends, if you’d like can add to when you’re at a specific place or location. To create a Group Story follow the steps below;
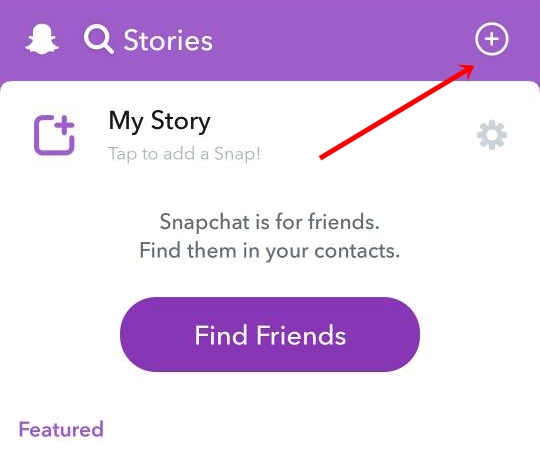
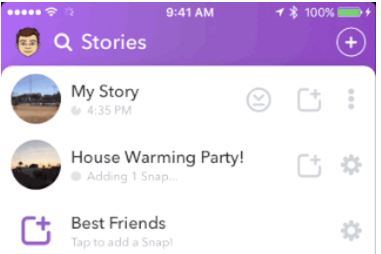
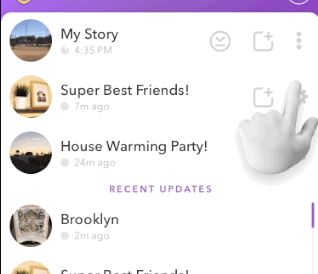
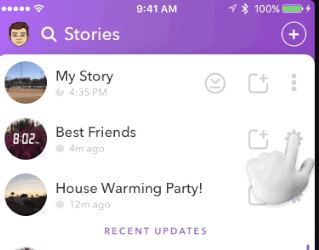
1. Open your Snapchat app as you normally do, once opened, go to the Stories Screen.
2. Tap the + button in the top-right corner of the screen to create a new Custom Story.
3. Now, Name your new Story. You can give any name you wish here.
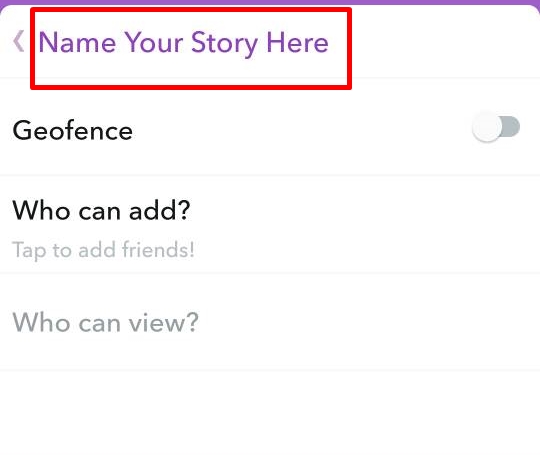
4. Tap ‘Who can add?’
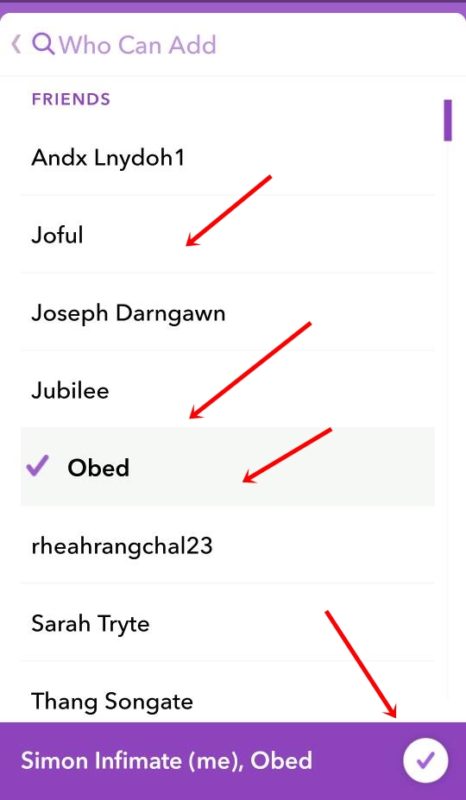
5. Choose who can add to this Group Story and tap on the Tick mark box button to confirm.
6. Tap ‘Who can view?’
7. Choose who can view this Group Story and tap on the Tick mark box button once you’ve decided. Friends who are just viewing the Story can’t add to it, but can still view the group contents.

8. Tap ‘Create Story’ to launch your new Group Story.
How to Create a Snapchat Geofenced Story
1. Open Snapchat and go to the Stories Screen.
2. Tap on the + button in the top-right corner to start a create new Custom Story.
3. Name your new Story as mentioned.
4. Now, Turn On the Geofence. See screenshot below.
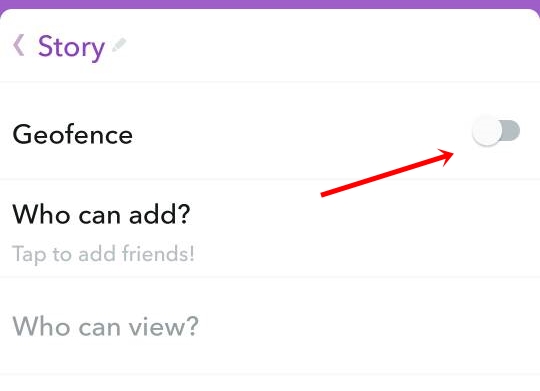
5. Wait for a second to load the location. Tap the address to rename it — the location will be set to wherever you are now.
6. Tap ‘Who can add?’ and choose who can add to and view this Geofenced Story. Now see the above the instructions on how to Add friends.
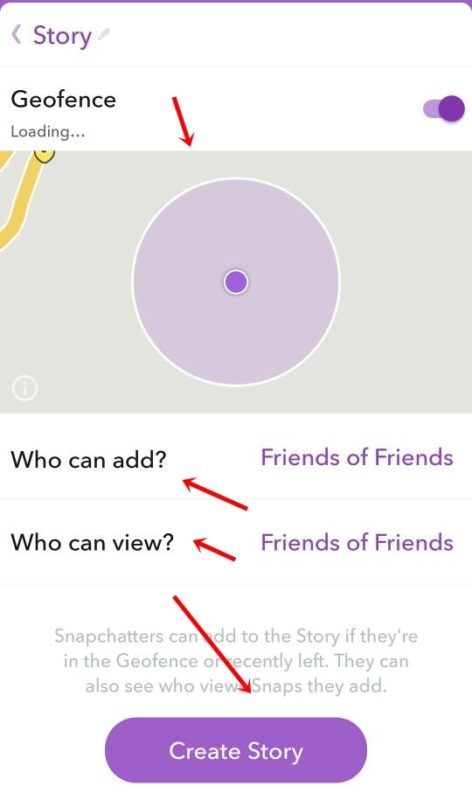
7. Finally, Tap on ‘Create Story’ to launch your new Geofenced Story.
SEE ALSO: How To Use Snapchat Story Playlist, Create Story Playlist & Use World Lenses Filters
How To Add to a Snapchat Custom Story
The below steps is on how to add a new Snap to a Custom Story.
There are two ways you can add to a Custom Story:
1. From your Stories screen, tap the + button which is beside a Custom Story to add a Snap to it.
2. After taking a new Snap, you can add it to a Custom Story you are a part of on the ‘Send To…’ screen. Here you need to select the group or story where to send it.
How To Delete a Snap from a Custom Story
If you want to delete the snap you have added to a Custom Story here’s how to delete a Snap from a Custom Story:
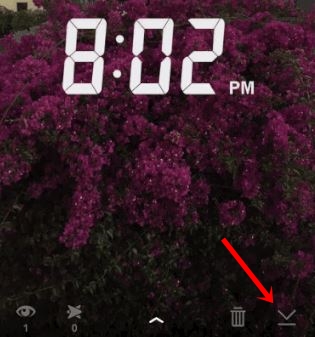
1. Go to your Stories screen.
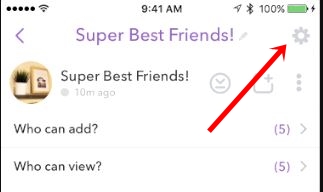
2. Tap the Settings button beside a Story. See the screenshot below.
3. Tap the three-dot button.
4. Now, choose the Snap you want to delete.
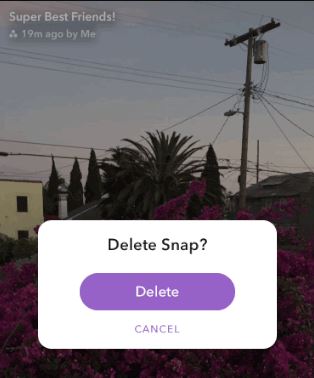
5. Tap the Delete button in the bottom-right corner.
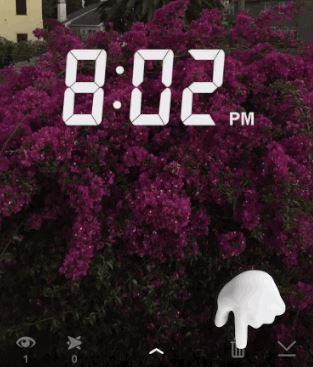
6. Tap ‘Delete’ to get rid of the Snap.
 How To Save a Snapchat Custom Story
Here’s how you save a Custom Story:
1. Go to your Stories Screen.
2. Tap the Settings button beside a Story.
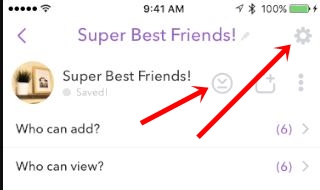
3. Now, Tap on the Save button to save it.
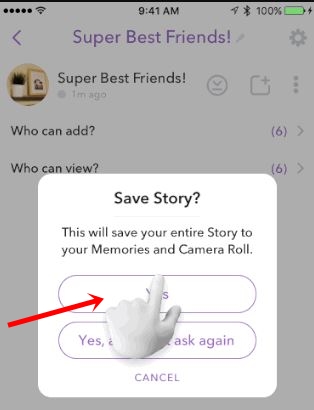
Please note that, if you created the Story or Group, then you can save the entire Story. However, if you are part of someone else’s Story, then only the Snaps you added to the Story will be saved. Whenever you saved a Snap, the person who posted it will be notified by screenshot icon in its read receipts.
In case, if you want to save only one Snap from a Custom Story, follow the steps below;
1. Go to your Stories screen.
2. Tap the Settings button or icon beside a Story
3. Tap the three-dot button.

4. Now, choose the Snap you want to save it.
5. Tap the Save icon or button in the bottom-right corner to save it to your device.
How To Manage Snapchat Custom Story
Like any other groups on Social networking site or messaging apps, if you create a Custom Story on Snapchat, you are in charge of the Story. You can add or remove friends from a Story, rename the Story, delete anyone’s Snaps from it, or save the entire Story as you like. Here’s how to add or remove friends from your Custom Story:
1. Go to your Stories Screen.
2. Tap the Settings icon or button beside a Story.
3. Tap ‘Who can add?’ to choose who can add to the Story or tap ‘Who can view?’ to choose who can view it. See the above instructions.
4. Select everyone you wish to add to the Story.
5. Uncheck everyone who wish to remove from the Story or group.
6. Tap on the Tick mark icon or button at the bottom of the screen to update.
READ: How to Use Snapchat Group Chat
How to rename Snapchat Custom Story:
Just in case, if you’d like to rename your Story for some other reasons, below is the steps on how to do this.
1. Go to your Stories screen.
2. Tap the Settings button beside the Story you want to edit.
3. Tap the name of the Story at the top of your screen.

4. Now, Rename the Story.
5. Once changed, the name of the Story will automatically update for all the members.
That’s it on Snapchat Custom Story. If you have any problem with creating Custom Storry let us know in the comments. Also, if you like this post, please kindly share.
RELATED SNAPCHAT POSTS:
Snapchat Geofilter List and How to Create Snapchat Geofilters On-Demand
How to Solve Snapchat Camera Problems
Snapchat Emojis Meanings & All the Snapchat Icons Meaning
Celebrity Snapchat Usernames 2018: List of Famous Celebrity Snapchats
How To Customize Snapcode? Change Snapchat Ghost Icon Color in Few Steps


Thanks
Pingback: How To Use Instagram Stories, Location Stories and Hastag Stories
Pingback: 11 Hidden Snapchat Features You Probably Didn't Know About